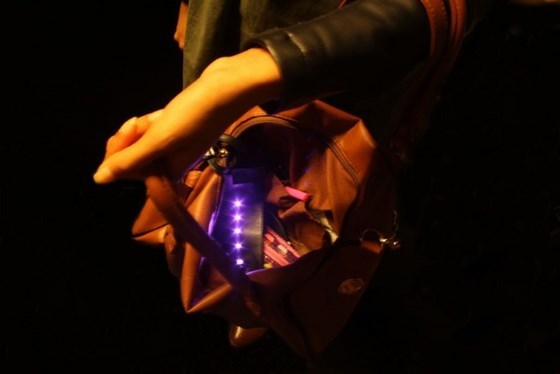
We’ve seen light up purses/wallets before and really like the idea that you can easily find your keys in the dark. A group of students at Nottingham Trent University though quickly realised that unless you want to hack all of your bags, there was no easy way to implement this into an expensive, stylish bag. Enter…BagLight

BagLight is a moveable LED strip designed to help people find items in their bag easily. It has a slide switch,so it can be turned on and off. It also uses a soft battery holder that makes the strip thin and compact.

The outside is made out of leatherette so it is in keeping with the aesthetics of bags, although any fabric could be used. The bag light has a strap that can be pinned or clipped on to the inside of a bag.

The soft battery pocket is secured with a snap fastener to give easy access to the coin cell so that it can be changed. BagLight is very easy to make, but requires a basic knowledge of textiles and circuits.
We got the team to create a step by step guide for you to make your very own BagLight, so without further ado:
Learn how to:
- Make an e-textiles product from scratch.
- Create and use a soft battery holder.
Level of difficulty:
- Intermediate. Requires basic textiles skills – hand sewing, machine sewing – and a basic understanding of simple electronic circuits.
Parts List:

In order to make your own BagLight you will need:
- Thick fabric or leatherette 2x (16cm x6cm) 1x (18cm x 2cm) 1x (4cm x 5cm) 1x (6cm x 2cm).
- Thin fabric 1x (16cm x 6cm).
- Conductive fabric 2x (1cm x 4cm).
- Bondaweb 2x (1cm x 4cm).
- 1 Snap fastener.
- 5 x Easy sew LEDs.
- Sewable slide switch.
- 3v coin cell.
- Ordinary sewing thread.
- Conductive thread.
- Soft battery holder (or alternatively you could make this project even easier by using one of our pre-assembled coin cell power boards).
You will also need the following equipment:
- Large eye e-textile needle.
- Leather punch.
- Sewing machine.
- Iron.
- Chalk.
- Ruler.
- Paper template.
Step-by-step guide to making a BagLight
Step 1

Print out the fabric template on an A4 sheet of paper, and cut out your fabric.
Step 2

Using the chalk, mark out where the conductive fabric, battery holder and components will be sewn on the thin fabric. For ours we spaced the LED’s approximately 1.5cm apart from the centre of each LED.

Step 3

On the highest setting with no steam, iron the bondaweb paper side up to the conductive fabric. Peel the paper off and then iron one piece to the thin fabric and the other to the battery pocket


Sew the battery pocket onto the thin fabric using the stitch guide lines to create a battery holder. For more information on this see our guide to creating a soft battery holder.

Step 4

Using the conductive thread, hand sew the components together in a parallel circuit. Make sure that all the positive and negative side of your components are in the same direction.

If in doubt refer to the simplified circuit diagram above.
Step 5

Mark out where the LEDs holes will go on the front piece and punch the holes through using a leather hole punch.

Fold the strap piece in half length ways and sew down the open edge. Secure it to the back with a pin or a piece of tape. Sew the strap and the battery flap to the back piece.

Hand stitch the snap fastener to the front piece and the battery flap.
Step 6
Sew all 3 pieces together – the thin fabric with your components on to the back piece and then sew the front piece to the rest of the item, making sure you leave a gap on the top for the battery.

Insert battery and test.
Step 7

Place your BagLight in your favourite bag, and enjoy!
This Kitronik University Course was produced by students of the NTU Subject Knowledge Enhancement (SKE) course, a course for graduates with a degree in a subject other than D&T, who wish to train as secondary Design and Technology teachers.
You can see our write up of their final presentations here.
We’d like to thank all of the students for their hard work over the seven week course, and wish them all the best in their future careers. Place your BagLight in your favourite bag, and enjoy!